
Stop treating your breakfast as a simple carbohydrate delivery vehicle. It is a structural marvel of cereal chemistry. When you bite into a legitimate bagel, that defiant, leathery tug is not an accident of heat; it is the result of precise Bagel Boiling Kinetics. Most home cooks skip the bath, producing nothing more than round, sad bread rolls. True New York style density requires a violent immersion in an alkaline solution to trigger surface starch gelatinization. This process locks the dough in place, preventing further expansion in the oven and creating a microscopic protein shield. Without this step, you lose the viscous interior and the high-gloss exterior that defines the genre. We are here to audit your current dough infrastructure and replace it with a system capable of producing professional-grade results. Forget the toaster; we are building a foundation of chew and shine that would make a Manhattan baker weep with joy. This is not just cooking; it is the manipulation of molecular bonds through thermal shock.
THE DATA MATRIX
| Metric | Specification |
|---|---|
| Prep Time | 24 Hours (Cold Fermentation) |
| Execution Time | 45 Minutes |
| Yield | 12 Bagels |
| Complexity | 7/10 |
| Estimated Cost per Serving | $0.45 |
THE GATHERS
Ingredient Protocol:
- High-Gluten Flour (14% Protein): 1kg / 8 cups
- Warm Water (35C): 550ml / 2.3 cups
- Barley Malt Syrup: 60ml / 4 tablespoons
- Fine Sea Salt: 20g / 1.2 tablespoons
- Instant Yeast: 7g / 2.25 teaspoons
- Alkaline Bath: 4 Liters Water + 30ml Barley Malt Syrup + 5g Baking Soda
Section A: Ingredient Quality Audit:
The most common failure point in bagel infrastructure is the use of All-Purpose flour. You require the high-tensile strength of High-Gluten flour to support the dense crumb. If you only have bread flour, you must supplement with 20g of vital wheat gluten to ensure the dough does not collapse during the boil. Furthermore, do not substitute honey for Barley Malt Syrup unless you want a flavor profile that lacks the traditional earthy depth. If your yeast is dormant, your bagels will be hockey pucks. Always bloom your yeast in a small portion of the 35C water to verify activity before committing to the full mix.
THE MASTERCLASS
1. The Hydration Phase
Combine your dry ingredients in a heavy-duty stand mixer. Slowly infuse the water and malt syrup into the flour while mixing on low speed. This is a low-hydration dough (roughly 55 to 58 percent), so it will be stiff. Use a digital scale for this process; volumetric measurements are the enemy of consistency in Bagel Boiling Kinetics.
Pro Tip: Low hydration is essential for the "chew." If the dough feels too soft, it will over-expand during the boil and lose its structural integrity.
2. The Gluten Development Audit
Knead the dough for at least 10 minutes until it is smooth and elastic. Use a bench scraper to manage the mass on your work surface. The dough should pass the "windowpane test," where a small piece can be stretched thin enough to see light through it without tearing.
Pro Tip: This mechanical energy aligns the gluten proteins into a tight matrix. This matrix is what traps the carbon dioxide produced during the long cold-ferment.
3. The Cold Fermentation Protocol
Shape the dough into 100g balls and poke a hole through the center, stretching gently. Place them on a parchment-lined tray and refrigerate for 18 to 24 hours. This slow chill allows for enzymatic activity that creates complex sugars, leading to better browning.
Pro Tip: Cold fermentation is non-negotiable for flavor. It allows the yeast to produce organic acids that provide that signature piquant tang.
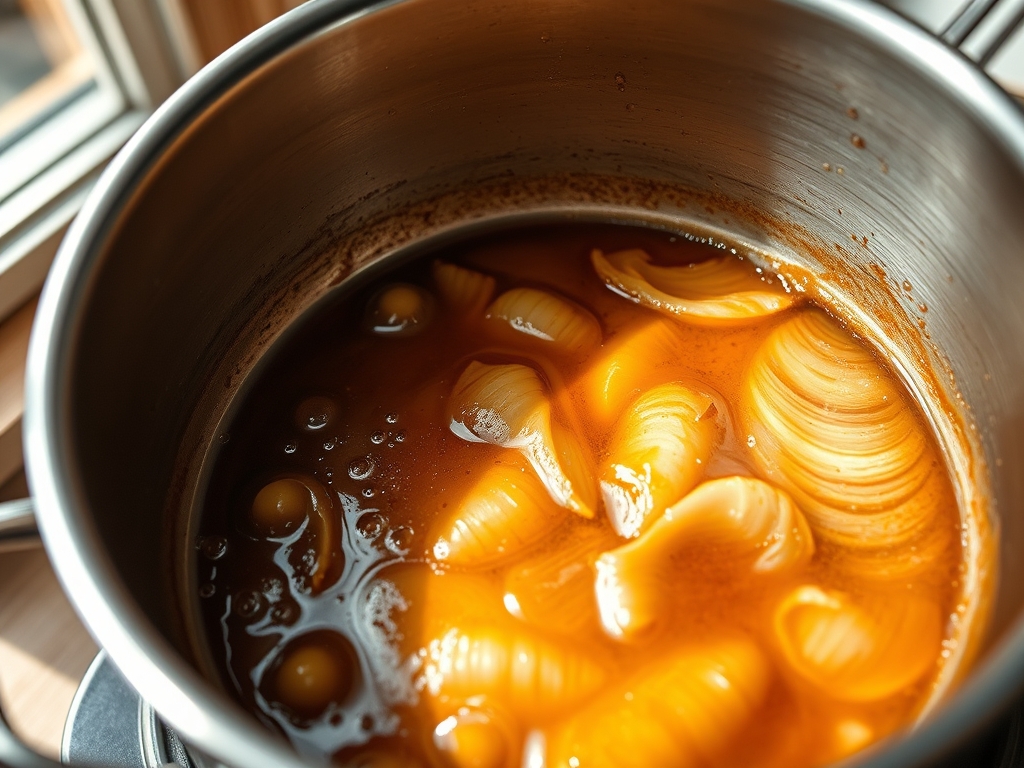
4. The Kinetic Boil
Bring your alkaline bath to a rolling boil in a wide saucier or stockpot. Drop the cold bagels into the water. They should float within 10 seconds. Boil for 45 to 60 seconds per side. The longer the boil, the thicker the crust and the denser the interior.
Pro Tip: The baking soda in the water raises the pH level. This accelerates the Maillard reaction once the bagels hit the oven, ensuring a deep, mahogany crust.
5. The Thermal Finish
Immediately transfer the boiled bagels to a baking stone or preheated heavy tray. Bake at 230C (450F) for 15 to 18 minutes. The surface should be blistered and hard to the touch when tapped.
Pro Tip: Use a steam-injection method or a spray bottle during the first 5 minutes of baking to keep the surface supple, allowing for one final "oven spring" before the crust sets.
Section B: Prep & Timing Fault-Lines:
If your bagels sink and stay at the bottom of the pot, your proofing time was insufficient or your water temperature was too low. The "float test" is your primary diagnostic tool. Conversely, if they over-expand and look like balloons, they have over-proofed. Reduce your room-temperature rest time before the cold ferment to tighten the crumb structure.
THE VISUAL SPECTRUM
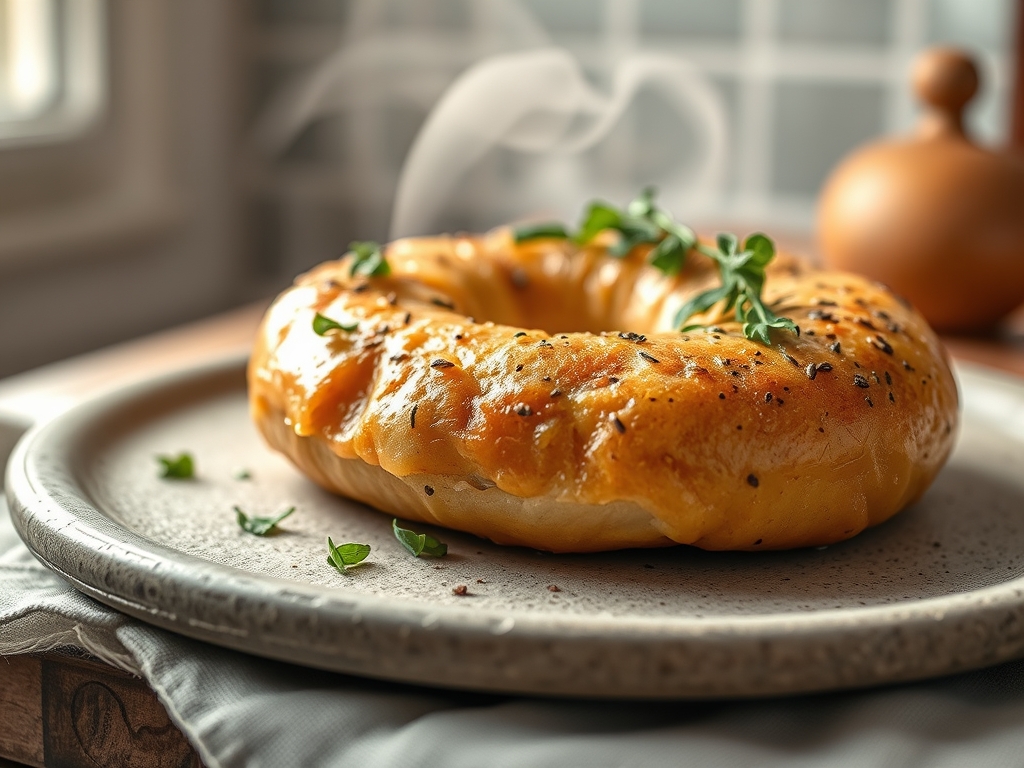
Section C: Thermal & Visual Troubleshooting:
Referencing the Masterclass photo, look for the "micro-blisters" on the surface. These tiny bubbles are the hallmark of a successful 24-hour cold ferment. If your bagels are matte and pale, your water bath lacked sufficient alkalinity or your oven temperature was too low. If the shape is irregular or "deflated" looking, you handled the dough too roughly after the boil. You must move the bagels from the water to the oven with surgical precision to maintain the internal air pockets. A dull, floury surface indicates you used too much bench flour during shaping; use a light touch or a damp work surface instead.
THE DEEP DIVE
Macro Nutrition Profile:
A standard 100g bagel provides approximately 280 calories, 10g of protein, 2g of fat, and 55g of complex carbohydrates. Because of the boiling process, the starch is more compacted, resulting in a lower glycemic index compared to white bread.
Dietary Swaps:
For a vegan-friendly version, ensure your malt syrup is certified. For Gluten-Free requirements, use a blend of brown rice flour and xanthan gum, though the Bagel Boiling Kinetics will change significantly; reduce boil time to 20 seconds to prevent the structure from dissolving.
Meal Prep & Reheating Science:
To maintain the molecular structure, never refrigerate a finished bagel; it accelerates starch retrogradation (staling). Freeze them in airtight bags. To reheat, slice and toast directly from frozen to render the interior soft while crisping the exterior.
THE KITCHEN TABLE
Why do I need to use barley malt syrup?
Barley malt provides the distinct "malty" sweetness and aids in the Maillard reaction. Using plain sugar results in a one-dimensional flavor and a less impressive crust color. It is the secret to professional-grade Bagel Boiling Kinetics.
Can I skip the 24-hour fridge rest?
You can, but you shouldn't. The cold ferment is where the flavor develops. Skipping it results in a "yeasty" bread taste rather than the complex, nuanced profile of a true artisan bagel. Patience is a structural ingredient.
My bagels are too soft and bread-like. What happened?
You likely used flour with low protein content or added too much water. High-gluten flour is mandatory. Also, ensure your boil is at least 45 seconds per side to properly gelatinize the exterior starch and restrict expansion.
Why did my bagels deflate after boiling?
This is usually caused by over-proofing. If the yeast has exhausted its fuel before hitting the water, the structure will collapse. Watch the dough carefully during the initial rise; it should look puffy but still feel firm.

