Listen to the sound of a structural failure. It is the wet, muffled thud of a saturated pastry wall collapsing under the weight of a spiced potato payload. In the world of high stakes street food, there is no greater sin than the soggy bottom. We are here to talk about Samosa Shell Integrity; the literal and figurative foundation of the fried triangle. To the uninitiated, it is just dough. To the culinary architect, it is a shortcrust lipid barrier designed to withstand the violent thermal expansion of internal steam while maintaining a shatteringly crisp exterior. We are engineering a vessel that must be robust enough to hold a piquant, dense filling, yet delicate enough to aerate into micro-blisters upon contact with 180C oil. This is not a snack. This is a study in gluten inhibition and fat distribution. If your crust lacks the structural fortitude to snap like a dry twig, you have not made a samosa; you have made a tragedy wrapped in flour.
THE DATA MATRIX
| Metric | Specification |
|---|---|
| Prep Time | 45 Minutes |
| Execution Time | 30 Minutes |
| Yield | 12 Units |
| Complexity (1-10) | 7 |
| Estimated Cost per Serving | $0.45 |
THE GATHERS
Ingredient Protocol:
- All-Purpose Flour (Maida): 250g / 2 cups
- Clarified Butter (Ghee): 60ml / 4 tbsp
- Carom Seeds (Ajwain): 5g / 1 tsp
- Fine Sea Salt: 6g / 1 tsp
- Ice Cold Water: 80ml / 1/3 cup
- Neutral Frying Oil: 1 Liter / 4 cups
- Yukon Gold Potatoes (Boiled/Cubed): 500g / 2.5 cups
- Frozen Peas: 75g / 1/2 cup
- Garam Masala: 10g / 2 tsp
Section A: Ingredient Quality Audit:
The primary failure point in Samosa Shell Integrity is often the protein content of the flour. If you use bread flour, the high gluten development will turn your shell into a chewy, elastic tire. If your flour is too weak, the structure will crumble before it hits the plate. The fix is a precise rubbing-in technique to coat flour particles in lipids before hydration. If your ghee is liquid at room temperature, chill it until it reaches a semi-solid state. This ensures that the fat creates distinct pockets rather than a homogenous, greasy mass. Furthermore, ensure your carom seeds are fresh; stale seeds provide no aromatic lift and fail to infuse the dough with their characteristic thyme-like punch.
THE MASTERCLASS

1. The Lipid Integration Phase
Begin by combining your flour, salt, and carom seeds in a wide stainless steel bowl. Introduce the chilled ghee. Use your fingertips to rub the fat into the flour until the mixture resembles coarse breadcrumbs. When you squeeze a handful, it should hold its shape.
Pro Tip: This process is called "Moyen." By coating the flour in fat, you are physically blocking water from bonding with glutenin and gliadin. Use a digital scale to ensure the fat-to-flour ratio is exactly 24% for maximum shatter-factor.
2. Low-Hydration Kneading
Gradually add the ice-cold water. You are looking for a stiff, almost recalcitrant dough. It should not be smooth or supple. Knead for only 3 to 5 minutes until it barely comes together. Cover with a damp cloth and rest for 30 minutes.
Pro Tip: A bench scraper is essential here to manage the stiff dough without adding extra heat from your palms. Resting allows the starch granules to hydrate fully without overworking the gluten network.
3. The Filling Reduction
In a heavy-bottomed saucier, toast your spices before adding the potatoes and peas. You must sauté the filling until all residual moisture has evaporated. A wet filling is the silent killer of Samosa Shell Integrity, causing the pastry to steam from the inside out.
Pro Tip: Use a potato masher to break down the spuds but leave some chunks for texture. The goal is to render out any excess water so the filling remains stable during the high-heat frying phase.
4. Geometric Architecture
Divide the rested dough into equal balls. Roll each into an oval, then slice in half with a sharp knife to create two semi-circles. Lightly moisten the straight edge with water, fold into a cone, and overlap the edges to seal.
Pro Tip: Use a rolling pin with tapered ends for better control over the thickness. The edges must be thinner than the base to ensure that when they are folded and crimped, the seam isn't twice as thick as the rest of the shell.
5. The Thermal Plunge
Heat your oil to 160C (320F). This is lower than standard frying temperatures. Slide the samosas in and fry slowly for 10 to 12 minutes. The low temperature allows the crust to dehydrate and crisp through its entire thickness before the exterior burns.
Pro Tip: Use an infrared thermometer to monitor the oil. If the oil is too hot, you will get large, ugly blisters and a raw interior. We want micro-blisters, which indicate a perfectly aerated shortcrust.
Section B: Prep & Timing Fault-Lines:
Timing is the difference between a golden masterpiece and a grease-soaked sponge. If you fry the dough immediately after kneading, the gluten will be too tense, causing the shell to shrink and pull away from the filling. If the oil temperature drops too low when you add the samosas, the dough will absorb the oil like a wick. Always fry in small batches to maintain thermal mass. If your filling is still hot when you stuff the pastry, the steam will immediately soften the dough, compromising the structural walls before they even touch the oil.
THE VISUAL SPECTRUM
Section C: Thermal & Visual Troubleshooting:
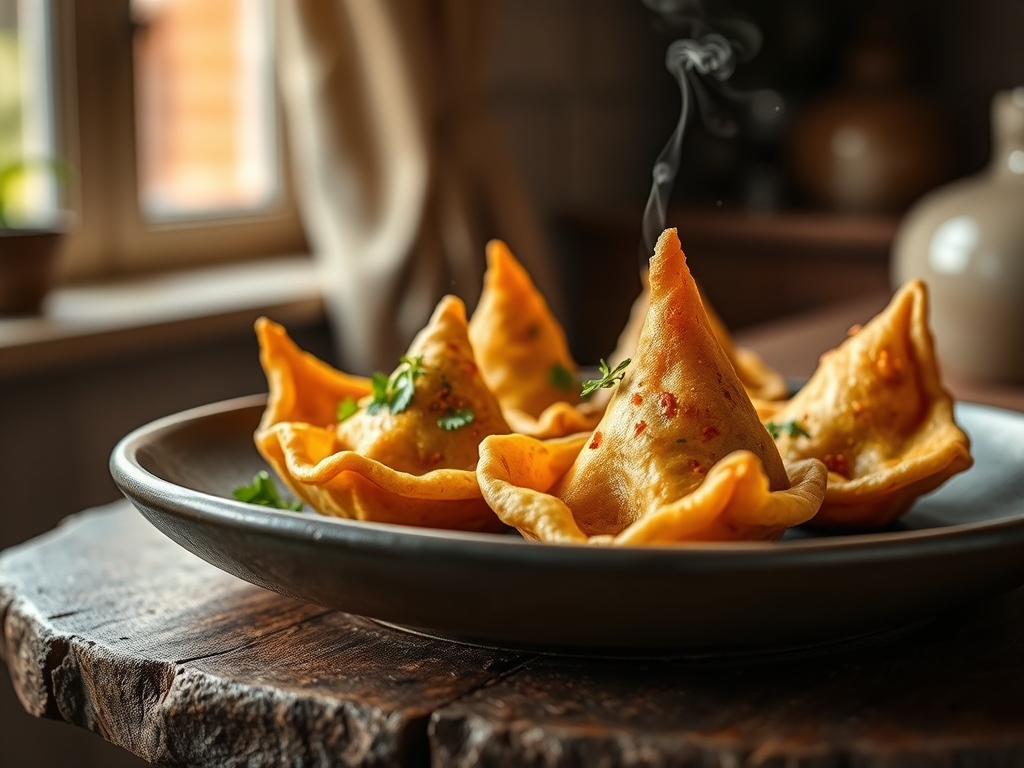
Look closely at the reference image. You should see a uniform, pale golden-tan hue with a matte finish and tiny, sand-like bumps on the surface. If your samosas are dark brown with large, smooth patches, your oil was too hot and your dough was too wet. If the shells appear translucent or "glassy," you have used too much fat, and the structure is failing to aerate. Dull, greyish tones suggest old oil or flour that has oxidized. The "snap" test is the ultimate visual cue; when broken, the crust should flake into distinct layers, revealing a dry, fluffy interior filling that does not cling to the walls of the pastry.
THE DEEP DIVE
Macro Nutrition Profile:
A single 80g samosa typically contains 220 calories; 12g of fat, 24g of carbohydrates, and 4g of protein. While calorie-dense, the satiety index is high due to the complex carbohydrates in the potato and the lipid content of the crust.
Dietary Swaps:
- Vegan: Replace ghee with chilled coconut oil or a high-quality vegan shortening. The saturation levels must remain high to ensure the shortcrust texture.
- Gluten-Free: Use a blend of rice flour and potato starch with xantham gum. Note that the "rubbing-in" phase is less critical here as there is no gluten to inhibit.
- Keto: Utilize almond flour and psyllium husk; however, the structural integrity will be significantly lower, requiring a thicker wall.
Meal Prep & Reheating Science:
To maintain molecular structure, never microwave a samosa. The microwave agitates water molecules, turning the internal moisture into steam that destroys the lipid barrier from within. Reheat in an air fryer or oven at 175C for 8 minutes. This re-crisps the exterior while gently warming the core.
THE KITCHEN TABLE
Why are there bubbles on my samosa shell?
Small micro-bubbles are a sign of success. They indicate that the cold dough hit the hot oil, causing tiny pockets of air and fat to expand. Large, unsightly blisters mean your oil was too hot or the dough was too soft.
Can I bake these instead of frying?
You can, but the texture will shift from a shatter-crisp fried shell to a more biscuit-like consistency. Brush heavily with ghee before baking at 200C to simulate the lipid-induced Maillard reaction found in deep frying.
How do I prevent the seams from opening?
Ensure your "glue" (water or a flour-water slurry) is applied sparingly. Press the edges firmly with your thumb and forefinger. If they still pop, your dough is likely too dry and needs more resting time to hydrate.
My crust is hard instead of crispy. What happened?
You likely overworked the dough or didn't use enough fat. Over-kneading develops gluten, creating a tough, bread-like structure. The "rubbing-in" of the ghee is the most vital step for a tender, flaky result.