
Forget everything you know about the pillowy, bleached, and chemically lobotomized loaves of the modern supermarket. We are here to discuss the structural integrity of the real thing. Whole Wheat Bread is not merely a side dish; it is a high-density architectural marvel that demands respect for its physical properties. When you slice into a properly executed loaf, you are witnessing the result of a brutal war between gluten development and the razor-sharp edges of wheat bran. If you mismanage the hydration, those bran shards will slice through your protein network like micro-shrapnel, leaving you with a dense brick suitable only for doorstops. But when you master the friction? You get a crumb that is nutty, robust, and structurally sound enough to support a mountain of toppings without buckling. It is a visceral experience. The smell of caramelizing sugars and toasted grain fills the room, signaling that the Maillard reaction has successfully transformed simple starches into a complex, mahogany-crusted masterpiece. This is culinary infrastructure at its peak performance.
THE DATA MATRIX
| Metric | Specification |
|---|---|
| Prep Time | 25 Minutes |
| Execution Time | 3.5 Hours |
| Yield | 1 Large Loaf (approx. 12-14 slices) |
| Complexity (1-10) | 7 |
| Estimated Cost per Serving | $0.45 |
THE GATHERS
Ingredient Protocol:
- 500g / 4 cups Hard Red Whole Wheat Flour
- 350ml / 1.5 cups Filtered Water (warmed to 35C / 95F)
- 10g / 2 tsp Fine Sea Salt
- 7g / 2.25 tsp Active Dry Yeast
- 30ml / 2 tbsp Raw Honey or Grade A Maple Syrup
- 45ml / 3 tbsp Extra Virgin Olive Oil or melted Unsalted Butter
Section A: Ingredient Quality Audit:
The primary failure point in Whole Wheat Bread is the age of the flour. Whole grain contains the germ, which is rich in oils that turn rancid when exposed to oxygen. If your flour smells like old crayons, your loaf is doomed. Fix: Purchase flour from high-turnover sources or mill it fresh. Another common audit failure is "dead" yeast. If your yeast does not aerate and foam within five minutes of hydration, discard it. Finally, check your water. Highly chlorinated tap water can inhibit yeast activity. Use filtered water to ensure the biological engine of your bread has a clean fuel source.
THE MASTERCLASS
Step 1: The Autolyse Protocol
Combine your flour and water in a large ceramic bowl until no dry spots remain. Cover and let rest for 30 minutes. This allows the flour to fully hydrate and the enzymes to begin breaking down starches before the yeast even enters the fray.
Pro Tip: This stage is vital for Whole Wheat Bread because it softens the bran. Softened bran is less likely to lacerate the gluten strands during the kneading phase. Use a digital scale to ensure your hydration ratio is precise to the gram.
Step 2: Inoculation and Integration
Add your yeast, honey, oil, and salt to the hydrated mass. Use a bench scraper to fold the dough over itself, incorporating the new elements without creating a sticky mess on your workstation.
Pro Tip: Honey acts as a humectant, helping the finished loaf retain moisture. The sugar also provides a quick energy source for the yeast to infuse the dough with carbon dioxide, ensuring a better rise in a dense environment.
Step 3: Mechanical Gluten Development
Knead the dough for 10 to 12 minutes by hand or 7 minutes in a stand mixer. You are looking for the "windowpane test" where a small piece of dough can be stretched thin enough to see light through it without tearing.
Pro Tip: If using a stand mixer, monitor the temperature. Friction from the hook can raise the dough temperature too high, killing the yeast. Professional bakers use an infrared thermometer to ensure the dough stays between 24C and 27C.
Step 4: Primary Fermentation
Place the dough in a lightly oiled bowl and cover with a damp cloth. Let it rise in a draft-free environment until it has doubled in size. This usually takes 60 to 90 minutes depending on ambient temperature.
Pro Tip: This is where the flavor profile deepens. The yeast consumes sugars and releases alcohol and acids, which render the wheat's complex flavors more accessible to the palate.
Step 5: Shaping and Final Proof
Degas the dough gently and shape it into a tight tension-surface boule or log. Place it into a greased loaf pan. Let it rise one last time for 45 minutes.
Pro Tip: Use a bench scraper to create tension on the outer skin of the dough. This "skin" acts as a structural cage that forces the bread to rise upward rather than outward during the bake.
Step 6: Thermal Execution
Preheat your oven to 190C (375F). Score the top of the loaf with a sharp blade and bake for 35 to 40 minutes. The internal temperature should register 93C (200F) on a probe thermometer.
Pro Tip: Steam is your best friend during the first 10 minutes. Toss a few ice cubes onto a preheated tray at the bottom of the oven. This keeps the crust supple, allowing for maximum "oven spring" before the crust sets.
Section B: Prep & Timing Fault-Lines:
The most common timing error is the "Under-Proof." If you rush the loaf into the oven before it has sufficiently expanded, the internal pressure will cause the bread to rupture at its weakest point. Conversely, an "Over-Proofed" loaf will collapse because the gluten structure has been stretched beyond its elastic limit. Always use the "finger dent test." If you poke the dough and it springs back slowly, it is ready. If it snaps back instantly, it needs more time. If the dent remains, you have waited too long; get it in the oven immediately.
THE VISUAL SPECTRUM
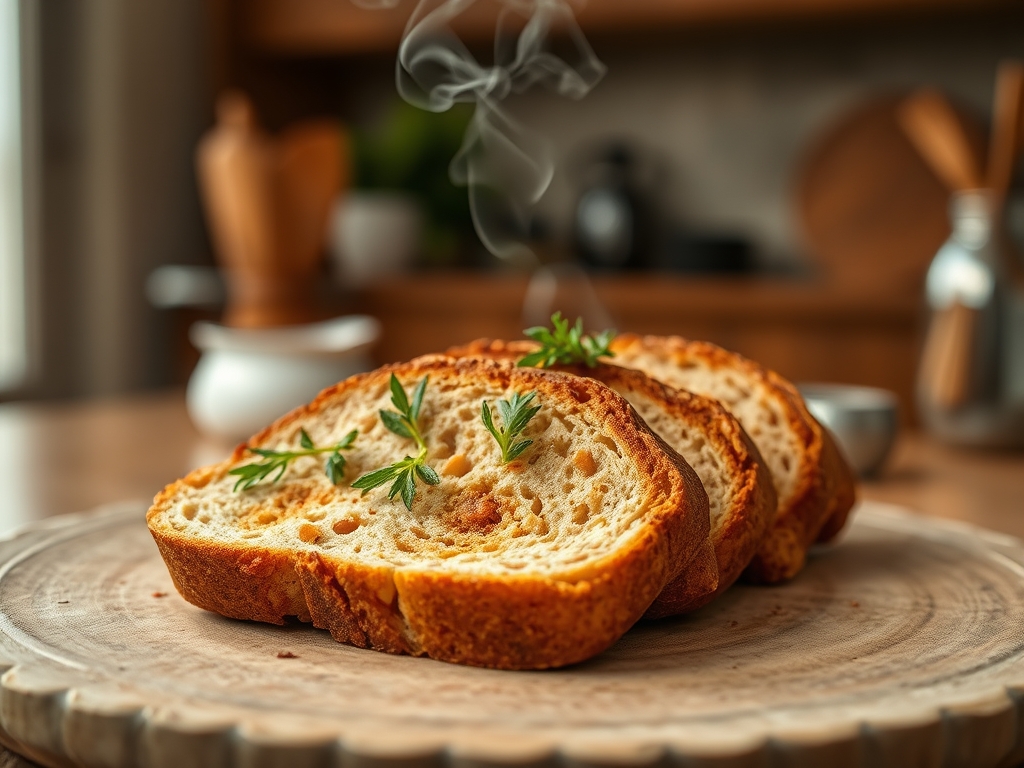
Section C: Thermal & Visual Troubleshooting:
Look at the Masterclass photo. Notice the deep, uniform mahogany color of the crust. This indicates a perfect Maillard reaction. If your loaf is pale, your oven temperature was likely too low or your dough lacked sufficient sugars. If the crust is excessively thick and hard, you likely lacked steam during the initial bake phase. A "dull" finish can be corrected by brushing the top with a light wash of melted butter immediately after extraction from the oven; this will infuse the crust with a piquant richness and a professional sheen. If you see large tunnels in the crumb, your shaping technique was too loose, allowing large air pockets to form.
THE DEEP DIVE
Macro Nutrition Profile
A single slice of this high-density infrastructure provides approximately 120 calories, 5g of protein, 3g of fiber, and 2g of healthy fats. Unlike white bread, the complex carbohydrates here provide a slow-release energy stream, preventing insulin spikes.
Dietary Swaps
- Vegan: Ensure you use maple syrup or agave instead of honey and olive oil instead of butter.
- Keto: This specific grain-heavy protocol is not keto-compatible; seek almond-flour-based alternatives.
- GF: To make this gluten-free, you must replace the wheat with a blend of sorghum and buckwheat flours, adding xanthan gum to mimic the missing protein matrix.
Meal Prep & Reheating Science
To maintain the molecular structure, never refrigerate your bread; the cold accelerates starch retrogradation, making it stale faster. Store at room temperature in a paper bag for 3 days. To reheat, use a toaster to re-gelatinize the starches and crisp the exterior.
THE KITCHEN TABLE
Why is my whole wheat bread so heavy?
Usually, this is due to insufficient hydration or under-developed gluten. The bran needs plenty of water to soften. Without it, the dough cannot stretch, resulting in a dense, leaden texture that fails to aerate properly during the bake.
Can I use 100% whole wheat flour?
Absolutely, but it requires a higher hydration level than white bread. Aim for at least 70% to 75% water-to-flour ratio. This ensures the bran particles are fully saturated and less likely to cut through your delicate gluten strands.
How do I get a softer crust?
To achieve a soft, sandwich-style crust, brush the top of the loaf with melted butter or milk immediately after it exits the oven. This traps moisture and prevents the crust from becoming overly rigid as it cools down.
What is the best way to slice it?
Wait at least one hour before slicing. Slicing a hot loaf allows steam to escape prematurely, which can lead to a gummy internal texture. Use a high-quality serrated bread knife and a gentle sawing motion for the cleanest results.

