
Stop treating your dough like a domestic pet and start treating it like a high-performance hydraulic system. We are here to talk about the structural integrity of the crumb; specifically, the chaotic beauty of the large pore network that defines world-class bread. When you analyze Ciabatta Hydration Data, you are not just looking at a recipe; you are looking at a blueprint for a controlled explosion of steam and carbon dioxide. The goal is a crust so thin it shatters like glass and an interior so translucent and airy that it barely exists. This is not for the faint of heart or the baker who fears a sticky workbench. We are pushing the boundaries of water absorption, often exceeding 80 percent hydration, to force the gluten into a state of extreme tension. If your dough does not look like a puddle of liquid silk before the first fold, you are not playing the game. Let us audit the mechanics of the "slipper bread" and turn your kitchen into a laboratory of gas retention.
THE DATA MATRIX
| Metric | Specification |
|---|---|
| Prep Time | 24 Hours (including Poolish) |
| Execution Time | 4 Hours |
| Yield | 2 Large Loaves |
| Complexity (1-10) | 8 |
| Estimated Cost per Serving | $0.45 |
THE GATHERS
Ingredient Protocol:
- Poolish (Pre-ferment):
- 200g / 1.5 cups Bread Flour (High Protein)
- 200ml / 0.85 cups Filtered Water (Room Temp)
- 1g / 0.25 tsp Instant Yeast
- Final Dough:
- 300g / 2.25 cups Bread Flour
- 200ml / 0.85 cups Filtered Water (Cool)
- 10g / 2 tsp Fine Sea Salt
- 3g / 1 tsp Instant Yeast
- 15ml / 1 tbsp Extra Virgin Olive Oil
Section A: Ingredient Quality Audit:
The primary failure point in high-hydration baking is the protein content of your flour. If you use standard all-purpose flour, the dough will lack the tensile strength to hold its shape; it will simply render into a flat, gummy pancake. You require a flour with at least 12.5 percent protein to support the weight of the water. If your flour is older than six months, the enzymatic activity has likely degraded. To fix a weak flour, add 10g of vital wheat gluten to the mix. Furthermore, if your water is heavily chlorinated, it will inhibit yeast activity. Use a charcoal filter or let your water sit out overnight to allow the chlorine to dissipate before you infuse the yeast into the slurry.
THE MASTERCLASS
Step-by-Step Execution:
1. The Pre-Ferment Initiation
Combine the poolish ingredients in a glass bowl until no dry clumps remain. Cover and ferment at room temperature for 12 to 16 hours. You are looking for a bubbly, viscous texture that smells slightly boozy.
Pro Tip: Use a digital scale for the poolish rather than volume measurements. Accuracy at this stage ensures the yeast-to-sugar ratio is optimized for a slow, flavorful fermentation.
2. The Autolyse and Integration
Add the remaining flour, water, and yeast to the poolish. Mix by hand or with a sturdy spatula until a shaggy mass forms. Let it rest for 30 minutes. This allows the flour to fully hydrate before the salt is added, which can otherwise tighten the gluten prematurely.
Pro Tip: This resting period uses the science of autolysis to begin breaking down starches into simple sugars, which will eventually render a deeper crust color through the Maillard reaction.
3. The Salt and Oil Incorporation
Add the sea salt and olive oil. Use a "pincer" method with your fingers to squeeze the salt into the dough. The oil acts as a lubricant, allowing the gluten strands to slide past one another without snapping, which is vital for achieving those massive air pockets.
Pro Tip: Keep a bowl of water nearby. Wetting your hands prevents the dough from sticking to your skin, acting as a natural barrier without adding excess flour that would skew your Ciabatta Hydration Data.
4. The Coil Fold Sequence
Instead of traditional kneading, use coil folds. Every 30 minutes, lift the dough from the center and let it fold under itself. Repeat this four times over two hours. This builds vertical strength in the dough while preserving the delicate gas bubbles.
Pro Tip: Use a bench scraper to help lift the dough from the container. This tool provides the leverage needed to handle the viscous mass without deflating the structure you have worked so hard to aerate.
5. Shaping and Final Proof
Gently tip the dough onto a heavily floured surface. Do not degas it. Use your bench scraper to cut the dough into two rectangular loaves. Move them onto a floured linen couche (or parchment paper) and let them proof for 45 minutes.
Pro Tip: The dough should feel like a pressurized pillow. If it spreads too thin, your gluten network was insufficient; next time, add an extra set of folds to increase structural integrity.
6. The High-Heat Launch
Preheat your oven to 475 degrees Fahrenheit with a baking stone inside. Carefully flip the loaves onto the stone. Inject steam by throwing ice cubes into a preheated cast iron pan at the bottom of the oven.
Pro Tip: Steam keeps the surface of the dough supple, allowing it to expand fully before the crust sets. This "oven spring" is what creates the iconic piquant aroma of toasted grain.
Section B: Prep & Timing Fault-Lines:
Temperature is the hidden variable that ruins most audits. If your kitchen is below 68 degrees Fahrenheit, your fermentation will stall, leading to a dense, "brick-like" crumb. Conversely, if it is too hot, the yeast will over-produce gas too quickly, causing the gluten to collapse. Use an infrared thermometer to check your dough temperature; the sweet spot is 75 to 78 degrees Fahrenheit. If you miss your window and the dough over-proofs, do not try to shape it. Instead, turn it into focaccia by spreading it in a pan with plenty of olive oil.
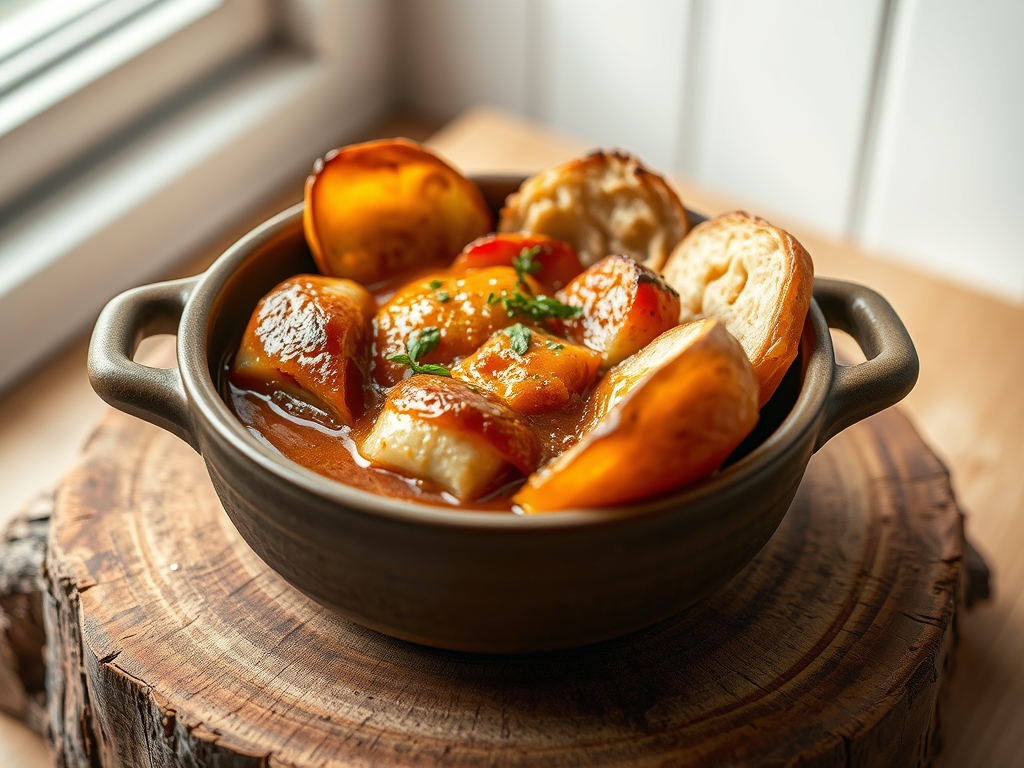
THE VISUAL SPECTRUM
Section C: Thermal & Visual Troubleshooting:
Look at the Masterclass photo above. Notice the "ears" or the jagged ridges where the dough expanded. If your crust is pale and soft, you likely lacked steam or your oven temperature was inaccurate. A dull, matte finish suggests the dough surface dried out during the proof; always cover your dough with a damp cloth or plastic. If the interior lacks the large, irregular holes shown in the image, your hydration was too low or you handled the dough too aggressively during shaping. The crumb should look like a translucent honeycomb; if it looks like sandwich bread, your Ciabatta Hydration Data was likely compromised by adding too much "bench flour" during the final stages.
THE DEEP DIVE
Macro Nutrition Profile:
Ciabatta is a high-carbohydrate, low-fat fuel source. A standard serving contains approximately 180 calories, 36g of carbohydrates, 6g of protein, and 1g of fat. Because of the long fermentation, the glycemic index is slightly lower than standard white bread, as the yeast consumes much of the simple sugars.
Dietary Swaps:
- Vegan: This recipe is naturally vegan. Ensure your olive oil is high quality to infuse the crust with flavor.
- Keto: High-hydration bread is fundamentally incompatible with Keto. However, you can substitute 20 percent of the flour with almond flour for a slightly lower carb count, though you will lose the large pore structure.
- Gluten-Free: Use a high-quality GF bread blend with added xanthan gum. You will need to increase the water by 10 percent as GF flours are highly absorbent.
Meal Prep & Reheating Science:
To maintain the molecular structure, never refrigerate your bread; the starch retrogradation happens fastest at fridge temperatures, leading to staling. Freeze sliced loaves in airtight bags. To reheat, toast directly from frozen or place in a 350-degree oven for five minutes to "refresh" the crust's crystalline structure.
THE KITCHEN TABLE
Why is my dough a liquid mess?
You likely lacked protein strength or skipped the autolyse. High hydration requires a disciplined folding schedule to organize the gluten into a web. Without those folds, the water wins and the structure collapses into a slurry.
Can I use a stand mixer?
Yes, but be careful. High-speed mixing can shear gluten strands in high-hydration doughs. Use the dough hook on low speed until the dough clears the sides of the bowl, then finish with hand folds to ensure aeration.
How do I get a shatter-crisp crust?
Steam is the non-negotiable factor. Without a moist environment for the first ten minutes of baking, the crust hardens too fast. This prevents the bread from expanding and results in a thick, leathery exterior rather than a crisp one.
Is the poolish really necessary?
The poolish provides the enzymatic breakdown required for that piquant, complex flavor. It also improves the shelf life of the bread by naturally lowering the pH, which slows down the staling process and inhibits mold growth.

