
The crunch is not a suggestion; it is a structural mandate. When we discuss the architecture of a superior flatbread, we are not looking for the pillowy, CO2-inflated voids of a Neapolitan sourdough. We are hunting for the snap of a high-tensile cracker and the buttery lamination of a pastry. This is the world of Pizza Dough Unleavened. It is a discipline of density where every millimeter of thickness is scrutinized for its ability to support a heavy payload of molten lipids and piquant pomodoro without suffering the catastrophic failure known as the "soggy middle." We are bypassing the biological unpredictability of Saccharomyces cerevisiae in favor of mechanical aeration and precise hydration control. This is culinary engineering at its most raw. You are not just a cook; you are a structural auditor ensuring that the interface between the stone and the flour results in a perfect Maillard reaction. If your crust does not shatter like glass under the pressure of a pizza wheel, you have failed the audit. Let us begin the calibration.
THE DATA MATRIX
| Metric | Specification |
|---|---|
| Prep Time | 10 Minutes |
| Execution Time | 12 Minutes |
| Yield | 2 Large Thin Crusts |
| Complexity | 3 / 10 |
| Estimated Cost per Serving | $0.85 USD |
THE GATHERS
Ingredient Protocol:
- All-Purpose Flour (High Protein): 375g / 3 cups
- Filtered Water (Room Temperature): 175ml / 0.75 cups
- Extra Virgin Olive Oil: 45ml / 3 tablespoons
- Fine Sea Salt: 8g / 1.5 teaspoons
- Honey or Agave (Optional for Browning): 5ml / 1 teaspoon
Section A: Ingredient Quality Audit:
The primary failure point in Pizza Dough Unleavened is the protein content of your flour. If you utilize a "cake" or "pastry" flour with low gluten potential, the structural integrity will collapse under the weight of the sauce. Always opt for a flour with at least 11 percent protein. If your dough feels overly elastic and snaps back too aggressively, your water may be too cold, hindering the relaxation of the gluten strands. Conversely, if the dough feels viscous or sticky, your humidity levels are likely high; compensate by dusting your work surface with an additional 15g of flour. Finally, ensure your olive oil is fresh. Rancid lipids will infuse the crust with a metallic aftertaste that no amount of premium mozzarella can mask.
THE MASTERCLASS
1. Dry Component Integration
Place your digital scale on a level surface and tare it with a large stainless steel mixing bowl. Sift the flour and sea salt together to aerate the mixture and remove any localized clumps of sodium. This ensures an even ionic distribution, which is critical for the flavor profile.
Pro Tip: Sifting does more than remove lumps; it introduces micro-pockets of air that help the oil coat individual starch granules more effectively, leading to a shorter, crispier crumb.
2. Lipid and Hydration Infusion
Create a well in the center of your dry pile. Pour in the filtered water and olive oil. Using a stiff silicone spatula or a saucier whisk, begin drawing the flour from the inner edges into the liquid center. Continue until a shaggy, cohesive mass forms and no dry pockets remain at the base of the bowl.
Pro Tip: The olive oil acts as a shortening agent in this unleavened matrix. It coats the gluten proteins, preventing them from forming long, chewy chains, which results in a tender "snap" rather than a bread-like pull.
3. Mechanical Kneading and Surface Tension
Transfer the mass to a clean workspace. Use a bench scraper to gather any stray fragments. Knead the dough for exactly three minutes. You are not looking for the extreme windowpane stretch of a brioche; you simply want a smooth, matte finish that feels like cold playdough.
Pro Tip: Over-kneading an unleavened dough will make it nearly impossible to roll out thin. Stop the moment the surface appears uniform. You are aiming for structural cohesion, not massive elasticity.
4. The Compression Rest
Wrap the dough tightly in professional-grade plastic film. Let it sit at room temperature for 30 minutes. This allows the moisture to fully penetrate the starch granules and the gluten network to relax after the mechanical stress of kneading.
Pro Tip: Skipping the rest period is the most common cause of "dough snap-back." A relaxed dough can be rolled to a thickness of 2mm without tearing, which is the gold standard for thin-crust applications.
5. Precision Rolling and Perforation
Divide the dough into two equal spheres. Using a heavy rolling pin, flatten the dough from the center outward. Once you achieve a thickness of 3mm, use a dough docker or a fork to perforate the entire surface. This prevents large steam bubbles from lifting your toppings during the bake.
Pro Tip: Use your bench scraper to rotate the dough 90 degrees after every few rolls. This ensures an even thickness and prevents the dough from adhering to the substrate.
Section B: Prep & Timing Fault-Lines:
The most frequent temporal error is the "pre-mature bake." If you roll the dough and immediately place it in the oven without docking it, the steam generated by the water content will cause the crust to balloon. This creates an uneven topography where the cheese slides into "valleys" and the "peaks" burn. Additionally, ensure your oven has preheated for at least 45 minutes with a baking stone or heavy steel inside. If the thermal mass is not fully saturated with heat, the bottom of your Pizza Dough Unleavened will be pale and flaccid rather than golden and rigid.
THE VISUAL SPECTRUM
Section C: Thermal & Visual Troubleshooting:
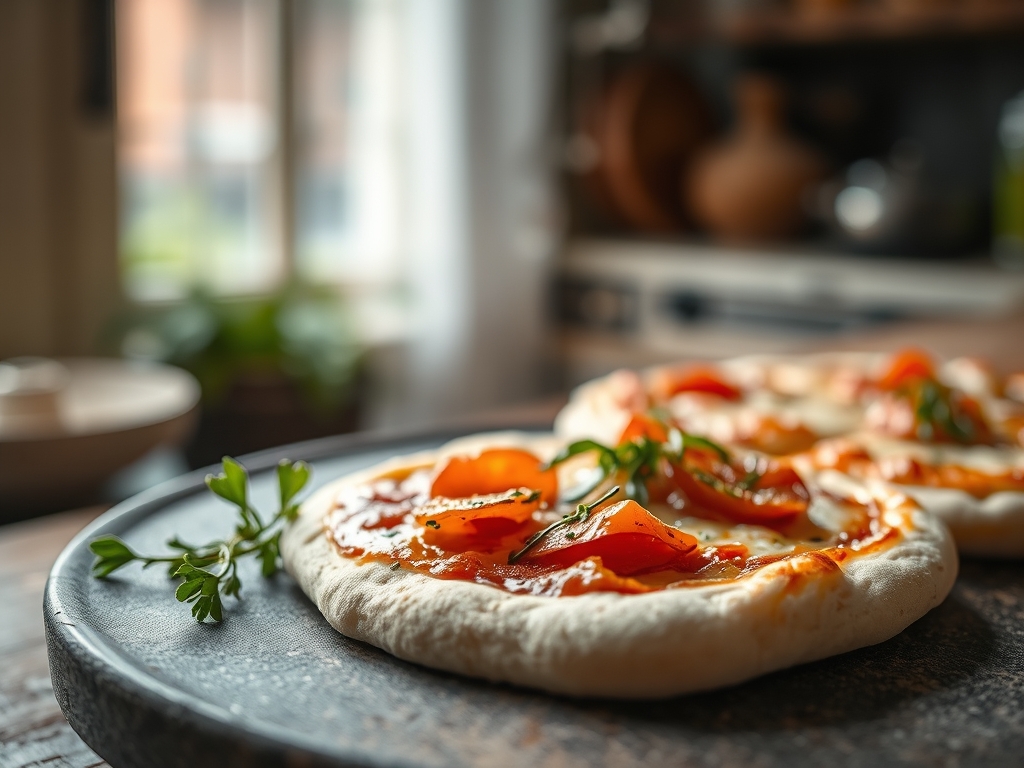
Referencing the Masterclass photo, observe the "leopard spotting" on the edges. This is achieved only when the oven temperature exceeds 500 degrees Fahrenheit. If your crust appears monochromatic or dull grey, you have a heat deficit.
- Uneven Browning: This indicates "cold spots" in your oven. Rotate the pizza 180 degrees halfway through the bake to ensure the radiant heat hits all sectors of the crust.
- Dull Surface Texture: This is often caused by excess bench flour. Use a pastry brush to sweep away any raw flour from the surface before adding your sauce.
- Soggy Center: If the photo shows a crisp edge but the middle is drooping, you have likely overloaded the "moisture-rich" toppings. Render the fat out of your meats or squeeze the liquid from your fresh mozzarella before application.
THE DEEP DIVE
Macro Nutrition Profile:
A single serving (half a large crust) typically contains approximately 340 calories, 9g of protein, 52g of carbohydrates, and 11g of lipids. Because there is no yeast fermentation, the glycemic index is slightly higher than a long-fermented sourdough, but the absence of added sugars keeps the metabolic impact manageable.
Dietary Swaps:
- Vegan: This recipe is naturally vegan. Ensure your "honey" swap is maple syrup or agave.
- Keto: Replace the flour with a blend of almond flour, xanthan gum, and whey protein isolate. Note that the rolling technique requires parchment paper for keto variants.
- GF: Use a high-quality 1-to-1 gluten-free blend containing rice flour and potato starch. Increase water by 10 percent to accommodate the higher absorption rate of GF starches.
Meal Prep & Reheating Science:
To maintain the molecular structure, par-bake the crust for 4 minutes at 450 degrees. Let it cool on a wire rack to prevent steam buildup. Store in a vacuum-sealed bag. When reheating, avoid the microwave at all costs; the electromagnetic waves agitate water molecules, turning your crisp crust into a rubbery mess. Use a toaster oven or a dry skillet to re-crisp the base.
THE KITCHEN TABLE
Why is my dough shrinking back?
The gluten is under tension. Allow the dough to rest for an additional 15 minutes at room temperature. This allows the protein bonds to relax, making the dough more pliable for the rolling pin.
Can I use bread flour instead?
Yes, but the higher protein content will result in a toothier, more "bready" texture. If you use bread flour, increase the olive oil by 5ml to ensure the final product remains crisp and not overly chewy.
Why did my crust turn out crackers-hard?
You likely over-baked it or rolled it too thin. Unleavened dough has a narrow window between "perfectly crisp" and "shatteringly dry." Monitor the edges closely; they should be golden brown, not dark mahogany.
Does the water temperature really matter?
Absolutely. Room temperature water (around 70 degrees) facilitates even hydration. Ice-cold water prevents the flour from absorbing moisture quickly, while boiling water will "cook" the flour and ruin the gluten structure entirely.

