
The kitchen is a battlefield of physics where the ultimate prize is a cloud of golden, yeasted perfection. We are not merely baking bread; we are conducting a high-stakes structural audit of the crumb. When you tear into a warm roll, you are witnessing the successful management of Dinner Roll Density. This metric defines the difference between a leaden, uninspired puck and a gossamer-light orb that defies gravity. To achieve this, we must manipulate gluten development and lipid distribution with surgical precision. We are looking for that specific, ethereal resistance that gives way to a moist, pillowy interior. This is a technical pursuit of the highest order. If your dough is too heavy, your hydration levels are a liability. If it is too light, your structural integrity is compromised. We demand a specific gravity that balances air and substance. Prepare your workspace and calibrate your senses. We are about to re-engineer the very concept of the dinner roll through rigorous technical application and culinary discipline.
THE DATA MATRIX
| Metric | Specification |
|---|---|
| Prep Time | 25 Minutes |
| Execution Time | 180 Minutes (Including Proofing) |
| Yield | 12 Technical Units (Rolls) |
| Complexity (1-10) | 6 |
| Estimated Cost per Serving | $0.28 USD |
THE GATHERS
Ingredient Protocol:
- 500g / 4 cups Bread Flour (High Protein Content)
- 300ml / 1.25 cups Whole Milk (Full Fat)
- 50g / 0.25 cup Granulated Sugar
- 10g / 2 teaspoons Fine Sea Salt
- 7g / 2.25 teaspoons Instant Yeast
- 75g / 5 tablespoons Unsalted Butter (Softened)
- 1 Large Egg (Room Temperature)
- 15ml / 1 tablespoon Neutral Oil (For Bowl)
Section A: Ingredient Quality Audit:
Sub-par raw materials are the primary cause of structural failure in leavened doughs. If your flour lacks a protein content of at least 12 percent, your Dinner Roll Density will skew toward the "crumbly" rather than the "elastic." Technical fix: Supplement with 10g of vital wheat gluten to provide the necessary scaffolding. If your yeast is sluggish, it may be due to improper storage. Always perform a bloom test in warm milk (38C / 100F) before proceeding. If the liquid does not aerate and foam within five minutes, discard and replace. Finally, cold butter is the enemy of a smooth emulsion. Ensure your lipids are pliable to ensure they infuse the dough without tearing the developing gluten network.
THE MASTERCLASS
1. Hydration and Initial Incorporation
Begin by combining your milk, sugar, and yeast in the bowl of a stand mixer. Once the yeast begins to aerate, add the egg and half of the flour. Use a sturdy whisk to create a viscous slurry.
Pro Tip: Use a digital scale for all measurements. Volume is a variable; mass is a constant. Precise hydration is the only way to guarantee consistent Dinner Roll Density across multiple batches.
2. Gluten Development and Lipid Integration
Switch to the dough hook and add the remaining flour and salt. Knead on low speed until a shaggy mass forms. Gradually add the softened butter one tablespoon at a time. This ensures the fat molecules coat the gluten strands without overwhelming them.
Pro Tip: Use a bench scraper to clean the sides of the bowl during integration. This ensures every gram of flour is hydrated and prevents "dry pockets" that cause uneven texture in the final product.
3. The Windowpane Verification
Increase the mixer speed to medium and knead for 8 to 10 minutes. The dough should become smooth, elastic, and pull away from the sides of the bowl. Perform the "windowpane test" by stretching a small piece of dough; it should be translucent without tearing.
Pro Tip: Temperature control is vital. If the dough exceeds 27C (80F) during kneading, the friction will prematurely activate the yeast. Use an infrared thermometer to monitor the thermal profile of the dough mass.
4. Primary Fermentation and Volumetric Expansion
Place the dough in a lightly oiled bowl and cover with a damp cloth. Allow it to rise in a warm, draft-free environment until it has precisely doubled in size. This usually takes 60 to 90 minutes depending on ambient humidity.
Pro Tip: Do not rush this stage. This is where organic acids develop, providing that piquant depth of flavor that distinguishes professional rolls from amateur efforts.
5. Precision Shaping and Final Proof
Degas the dough gently and divide into 12 equal portions (approximately 80g each). Using the palm of your hand, roll each portion against an un-floured surface to create tension on the outer skin. Place in a greased baking pan.
Pro Tip: Tension is the secret to a high-domed roll. A tight "skin" on the dough ensures the gases expand upward rather than outward, maintaining the target Dinner Roll Density.
6. The Thermal Finish
Bake at 190C (375F) for 18 to 22 minutes. The rolls should reach an internal temperature of 90C (195F). Immediately upon removal, brush with melted butter to render the crust soft and shimmering.
Pro Tip: Use a heavy-duty cooling rack to prevent "sweating." If the rolls sit in the pan, steam will collect at the base and ruin the bottom crust's structural integrity.
Section B: Prep & Timing Fault-Lines:
Timing errors are the silent killers of the perfect roll. Over-proofing occurs when the yeast consumes all available sugars before the heat of the oven can set the structure. This results in a "collapsed" roll with a hollow, yeasty interior. If you miss your window, punch the dough down and perform a shorter second rise to reset the biological clock. Conversely, under-proofing leads to "oven spring" so violent that the rolls tear at the base. Always use the "finger poke" test; if the indentation fills back slowly, you are ready for the oven.
THE VISUAL SPECTRUM
Section C: Thermal & Visual Troubleshooting:
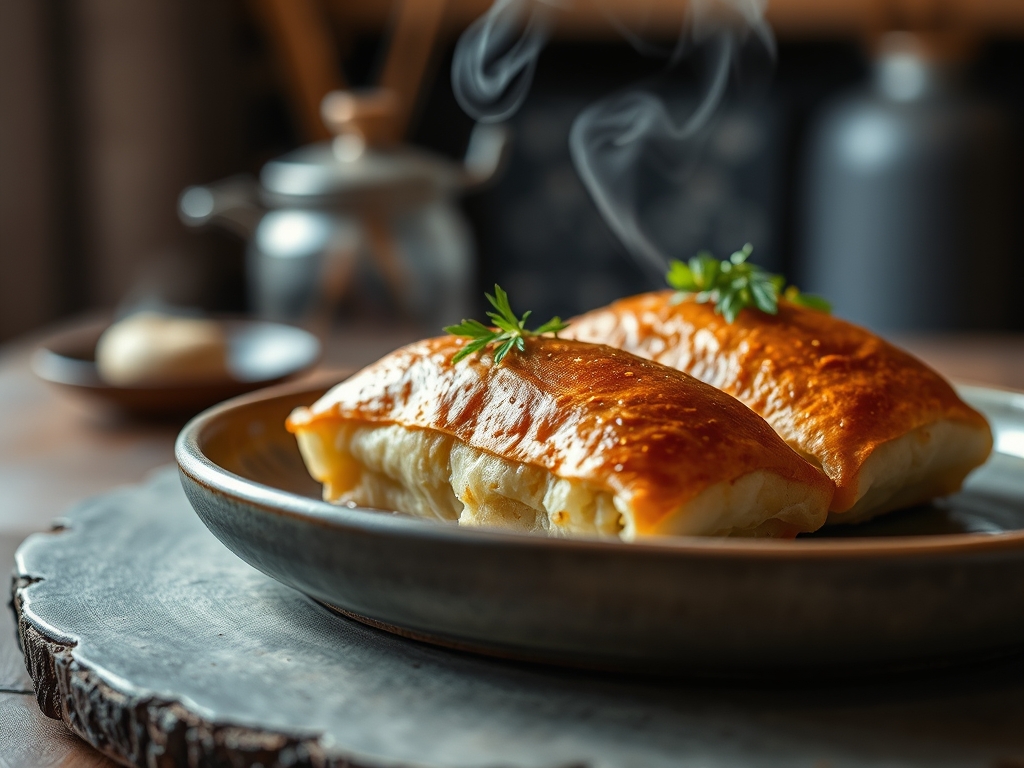
The Masterclass photo displays a specific "mahogany" sheen on the crust. If your rolls are pale, your oven temperature is likely too low, or you neglected the egg wash. A dull finish indicates a lack of steam or lipid coating during the final minutes of baking. If you notice uneven browning, it suggests "hot spots" in your oven; rotate the pan 180 degrees halfway through the cycle. The photo also shows a "tight crumb" with micro-pores. If your rolls have large, irregular holes, you have over-hydrated the dough or failed to degas it properly during the shaping phase.
THE DEEP DIVE
Macro Nutrition Profile
Each technical unit (one roll) contains approximately 220 calories. The profile consists of 32g of Carbohydrates, 6g of Protein, and 8g of Fat. The high protein content from the bread flour and egg provides the structural "snap" required for a premium audit.
Dietary Swaps
For a Vegan adaptation, substitute the milk with unsweetened soy milk and the butter with a high-quality vegan block butter (ensure it has a high fat-to-water ratio). For Gluten-Free requirements, a 1-to-1 flour blend containing xanthan gum is necessary, though the Dinner Roll Density will naturally be higher due to the lack of traditional gluten scaffolding.
Meal Prep & Reheating Science
To maintain the molecular structure, store rolls in an airtight container at room temperature for up to three days. Do not refrigerate; this accelerates starch retrogradation and makes the bread go stale. To reheat, wrap in foil and bake at 150C (300F) for 10 minutes. This gently re-gelatinizes the starches without drying out the crumb.
THE KITCHEN TABLE
Why are my rolls dense like bricks?
This is a failure of Dinner Roll Density management. Either your yeast was expired, or you over-floured the dough during the kneading process. Always measure by weight to ensure the hydration ratio remains within the professional threshold.
Can I make the dough the night before?
Absolutely. A cold ferment in the refrigerator slows down the yeast, allowing for complex flavor development. Just ensure the dough returns to room temperature before you attempt the final shaping and proofing stages.
What causes the rolls to pull apart in layers?
This is usually a result of "laminating" the dough during the shaping phase. If you fold the dough over itself multiple times with flour in between, you create distinct layers rather than a uniform, pillowy crumb.
Why is the bottom of my roll burnt but the top is raw?
Your oven rack is too low. Move the tray to the center position to ensure even heat distribution. Additionally, using a light-colored baking pan reflects heat, whereas dark pans absorb it and can scorch the base.

